Do you want to root the Android smartphone or tablet? Do you want to install TWRP recovery and flash custom ROMs? If yes, then you are in the right place. In this tutorial, we’ll discuss some easy steps for unlocking the bootloader of any Android phone. Before you install TWRP recovery or flash custom ROMs, you will have to unlock the bootloader of your Android.
What is Bootloader?
The bootloader is a code that is executed before any Operating System starts. Every Android phone has a bootloader that instructs the OS kernel to boot normally. Since Android OS is an open-source OS, every manufacturer has its own bootloader version.
Why is Bootloader locked?
It is not possible to install TWRP recovery or flash custom ROMs on a locked bootloader. Forced attempts to unlock the bootloader can void the warranty and brick the device. Hence, manufacturers usually lock the bootloader to make the users stick to their official Android OS.
Why unlock Bootloader on Android?
If you want to root, flash a custom recovery like CWM/ TWRP, or flash custom ROMs, then you need to have your bootloader unlocked. That means unlocking the bootloader allows you to gain root access, flash unofficial custom recoveries, third-party custom ROMs, take Nandroid backup and restore, increase internal memory, remove bloatware, and much more. Phones like Motorola, Sony, LG, HTC, Xiaomi, and Huawei use a unique code through their website to unlock bootloaders. Samsung phones (Exynos models) that can be rooted have unlocked bootloaders. Whereas the new Snapdragon models of Galaxy S9, S9 Plus, S8, S8 Plus, S7, S7 Edge, Note 8, etc. all have locked bootloaders. Moreover, the bootloader of Google Nexus or Pixel devices like Pixel 2 XL, Pixel 2, Pixel XL, Nexus 6, Nexus 6P, etc., can be easily unlocked using this guide. Also, the bootloaders of all OnePlus devices, including the OnePlus 6, OnePlus 5/5T, OnePlus 3/3T, etc., can be unlocked. If you’re unsure whether your device’s bootloader can be unlocked, you can still refer to this tutorial. It’s great if it passes. If it fails, no damage will be done.
Disclaimer
We at Droid Thunder are not responsible for any damage caused to your device by referring to this guide. Also, you will lose your phone’s warranty.
Requirements
Charge your Android device at least up to 50%. Unlocking the bootloader will erase everything on your Android. Hence backup your data, including contacts, messages, apps, call logs, notes, etc.
Steps to Unlock Bootloader on Android
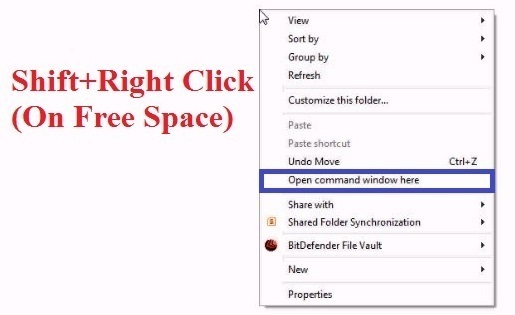
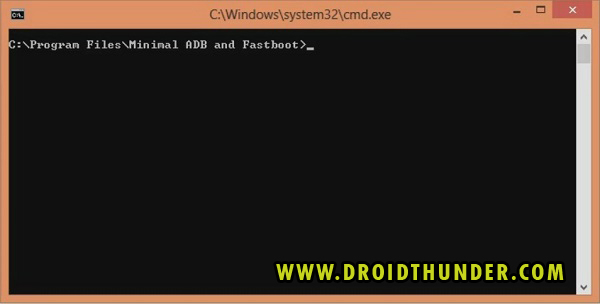
Go to Settings and enable USB debugging mode on your device. Also, enable OEM unlocking and Advance reboot mode from the Developer options. Note: Older Android devices may not have these options. So if you don’t find these options anywhere, skip this step. Download and install ADB drivers on your Windows PC. Using a standard USB cable, connect your Android device to a PC. Furthermore, ensure that Mobile USB drivers are installed on your PC. Go to the location where you’ve installed ADB and Fastboot drivers. (For example, C:\Program Files\Minimal ADB and Fastboot folder). Then by holding the shift button of your keyboard, right-click on space. From the list, choose the Open command window here option. This will launch the command window.
Then type the following commands one after one in the cmd window, and press the enter key:
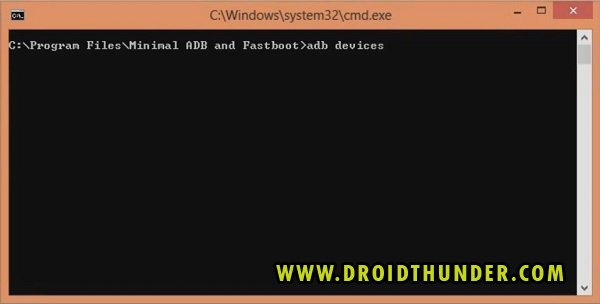
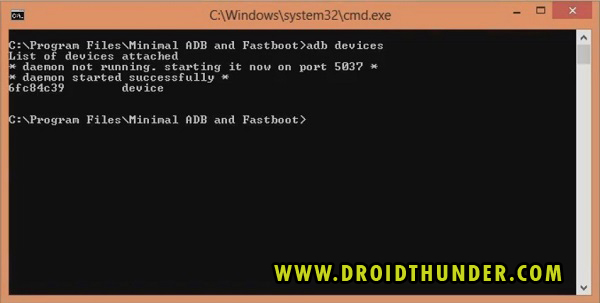
adb devices
With this command, a message saying ‘List of devices attached’ along with a few random numbers will appear. That means it will confirm that your Android device is successfully connected to the PC.
Note: If such a thing doesn’t happen, then either re-install mobile USB drivers or change the USB cable/PC. Type the next command and press enter:
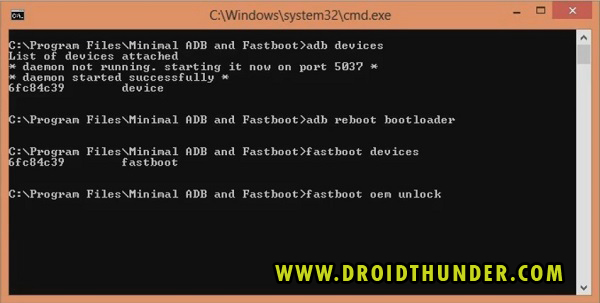
adb reboot bootloader
This will restart your device into Fastboot mode. Then type the Fastboot command and press enter:
fastboot devices
To unlock the bootloader, type either of the command and press enter:
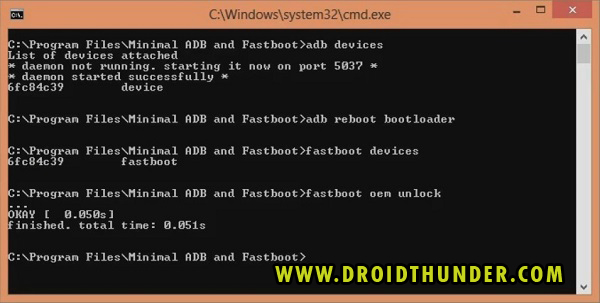
fastboot oem unlock OR fastboot flashing unlock
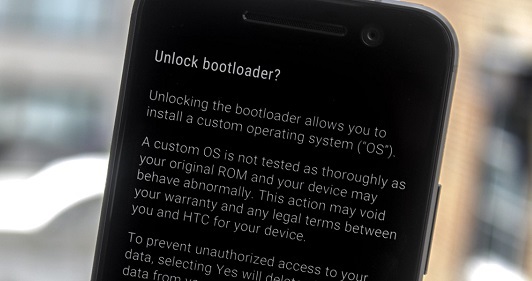
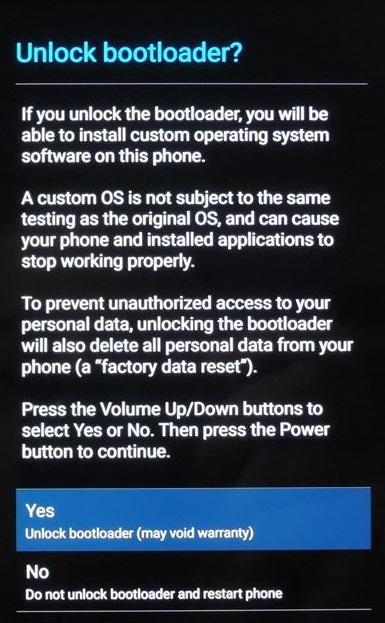
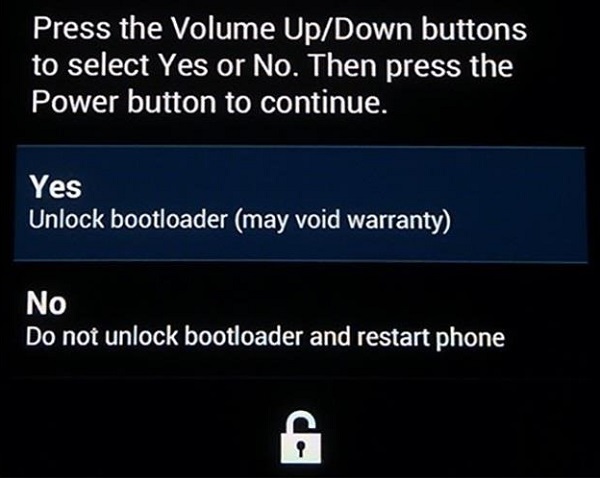
With this command, you’ll see a message on your device asking to Unlock Bootloader.
Note: On your phone screen, use Volume Up and Down keys for navigation and the Power key for selection. So using the Volume keys navigate to the Yes option and press the Power key to select it.
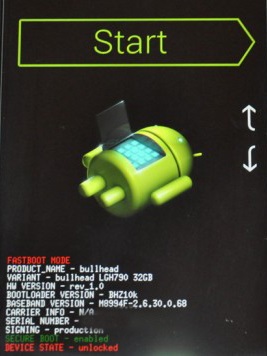
The actual bootloader unlocking process will begin now. Once the bootloader unlocking process completes, your Android device will automatically restart itself. Note: If the following screen appears on your phone, then use the Volume and Power keys to select the Start option and reboot your phone.
Conclusion
Finally! This is how you can unlock the bootloader of any Android phone with a PC. Now you can root, install a custom recovery, flash custom ROMs, take Nandroid backup, and much more. If you face any problems, then please comment below. Source: XDA Notify me of follow-up comments by email. Notify me of new posts by email.
Δ Unfortunately the commands fastboot oem unlock OR fastboot flashing unlock do not work for my ASUS ME302C (Intel chipset) Tablet. Do you have any idea how to unlock the ASUS Droidboot Bootloader? Thank you! Best regards, Tobias The adb reboot bootloader command definitely works. Perhaps an additional step should be performed before unlocking the bootloader on Realme 7. Could you please refer to the article on the official Realme website: https://c.realme.com/in/post-details/1394906994695036928 At step 10 my Realme 7 reset and went to Android 10 UI1 RMX2151_11_A.91 from RMX2155_11_F.07. After reaching step 12, to install and use the Deep Test apk on my phone, I got an error message saying “this phone model does not support in-depth test”, so I assumed I was using the wrong apk and downloaded one from the official website but I still got the same error. https://c.realme.com/in/post-details/1394906994695036928#reply I then tried unlocking the bootloader using fastboot but got “FAILED (remote: Unable to open fastboot HAL) error”. I have double checked my drivers and still nothing. https://www.droidthunder.com/unlock-bootloader/ I have tried letting the phone upgrade and update on its own but it stopped once it reached RMX2155_11_A.91. Putting the latest UI2 package in the phone and installing it while the phone is in recovery mode did not work too. I am running out of options now